Hi! I am Kristen from 1 Sew Green Mama. Over at 1 Sew Green Mama I am busy, sewing, knitting, gardening or working on being as green as I possibly can… on a budget.
I am so excited to be here at Lady Bug Blessings. I love Kristen’s idea’s and I absolutely love Handmade Tuesdays. I was inspired to do 2 whole birthday gifts hand made after reading her post.
Being new at this, it’s my first time guest blogging and Kristen was so kind to help me with all the details and she has the best name! So, getting onto today, I picked the tutorial that seems to be a favorite over at my blog and here it is.
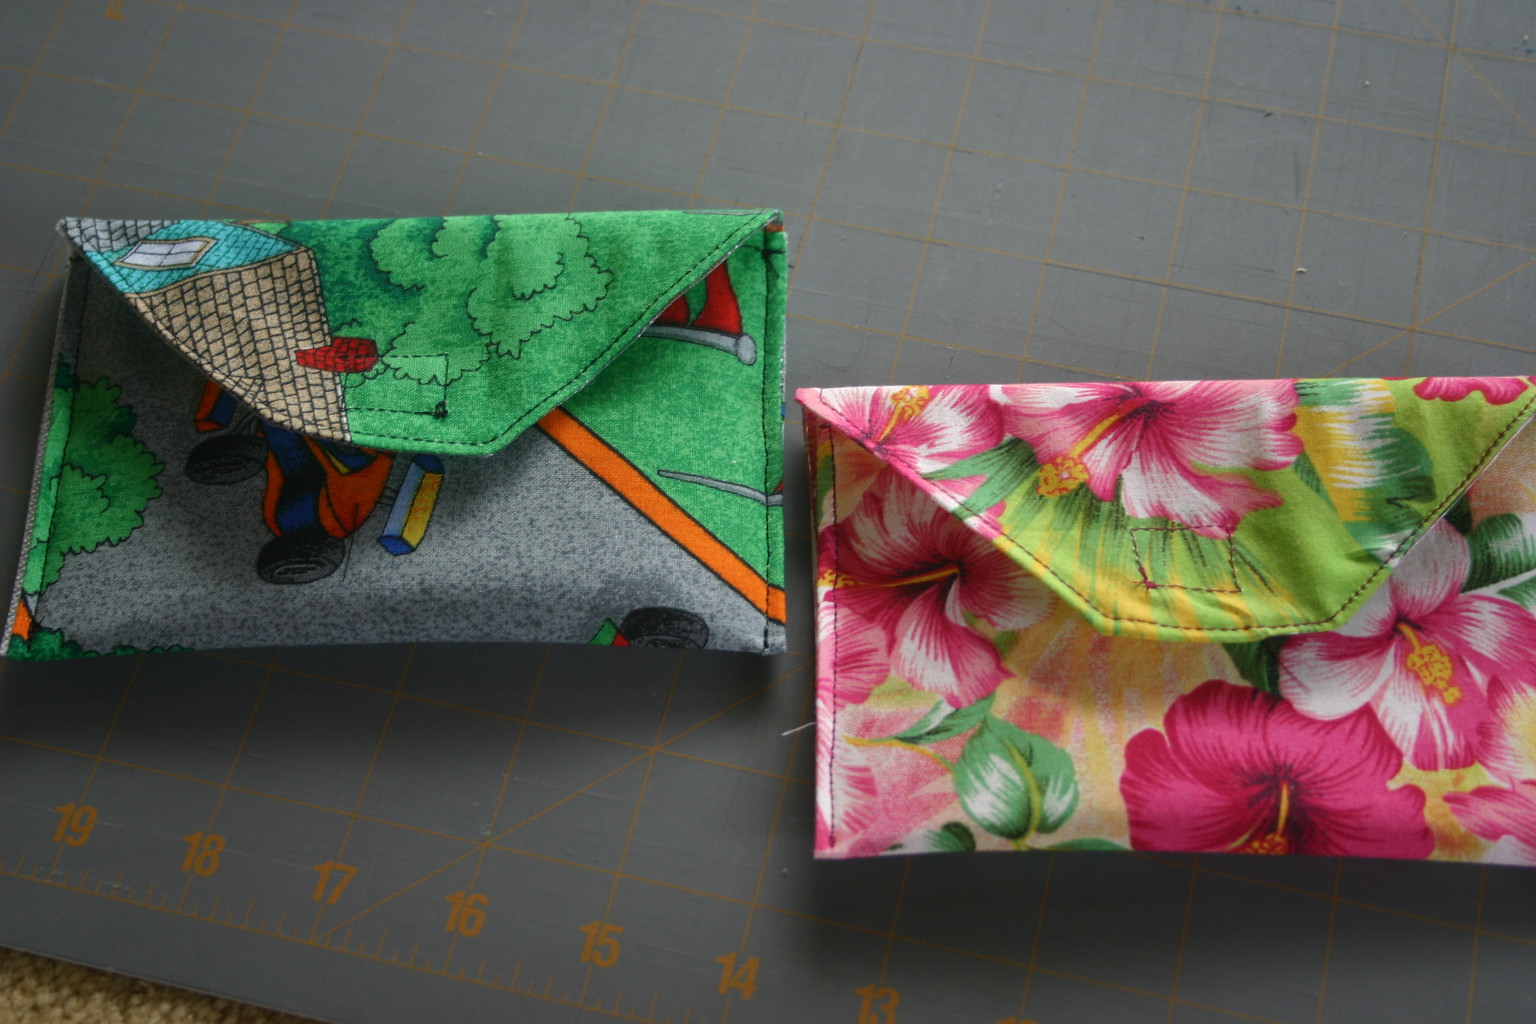
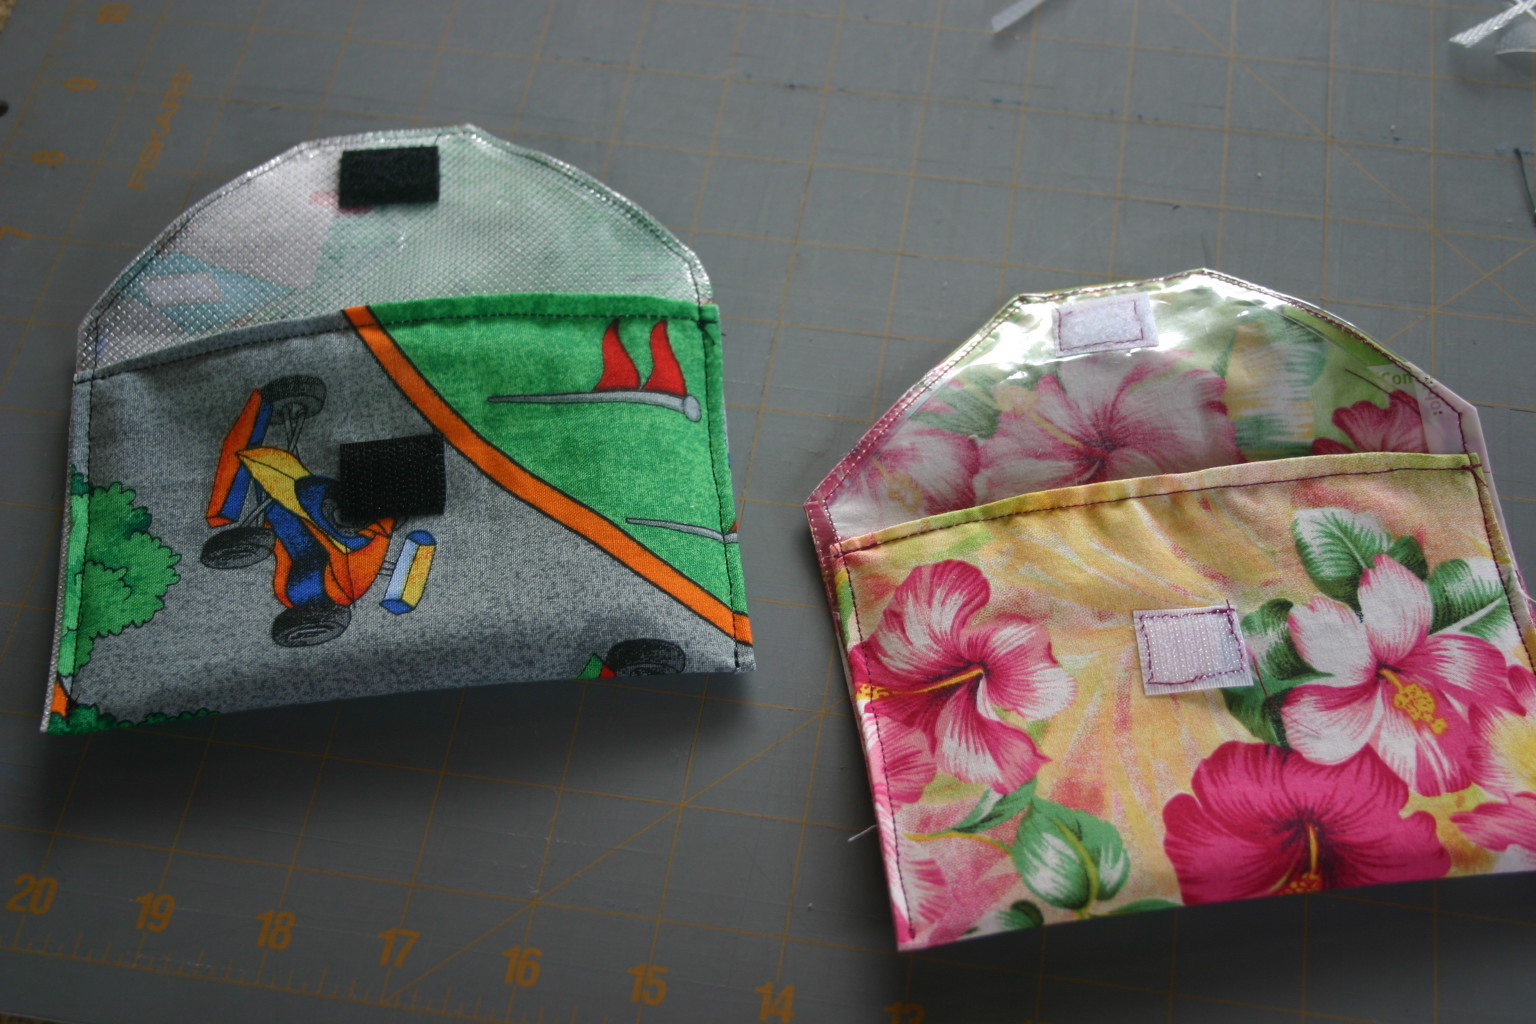
When my son started preschool I started thinking how much waste he was going to have with his lunch. I knew the preschool wasn’t recycling so I wanted food containers that didn’t have a bunch of toxins in them and that were re-usable. So, I searched around and found little tins that were nice, but expensive. I bought him 1 for his yogurt, but I needed more. I did also find a reusable sandwich wrap, it was cloth on the outside and plastic on the inside. It was also washable. That’s when I thought of the snack packs! I was so excited. I had some old scrap fabric that was in strips. Not much I could do with, but C sure loved it. So, I thought that would be perfect. Now, it took almost a year to figure out what plastic to use and I came up with the food saver bags. They are washable and they are food safe with no voc’s or bpa’s. ![]()
Here are my snack packs. The kids LOVE them. Plus when they get too dirty for a good wiping with water, I just throw them in the wash.