
So I hope everyone had an excellent weekend. I had a friend in from Australia and got to play Nashville tourist and had a blast! (Hence my lack of posting!) This week’s Handmade Tuesdays tutorial is a little different in I have never had a food tutorial AND I have never done the tutorial myself. But I am currently obsessed with sushi and wanted to show you how to make your own at home! I do not have any fancy tools, or even the “required” mat. So it can be done with absolutely no supplies other than the food. Enjoy!


First you need to gather your supplies. They sell them at most grocery stores. You may either be able to find them in the International aisle or in the seafood section where they sell the sushi.
Supplies
- sushi rice- it is a certain kind of rice. It is not as long as other types of rice.
- Rice vinegar- Do not use regular vinegar. Not the same thing!
- Seaweed aka nori- this comes in sheets
- Fillings- I use crab, avocado and I would have used cucumbers if I would have had some.

Start by making and seasoning your rice. Cook the rice according to the instructions and then add the vinegar when it is still hot.
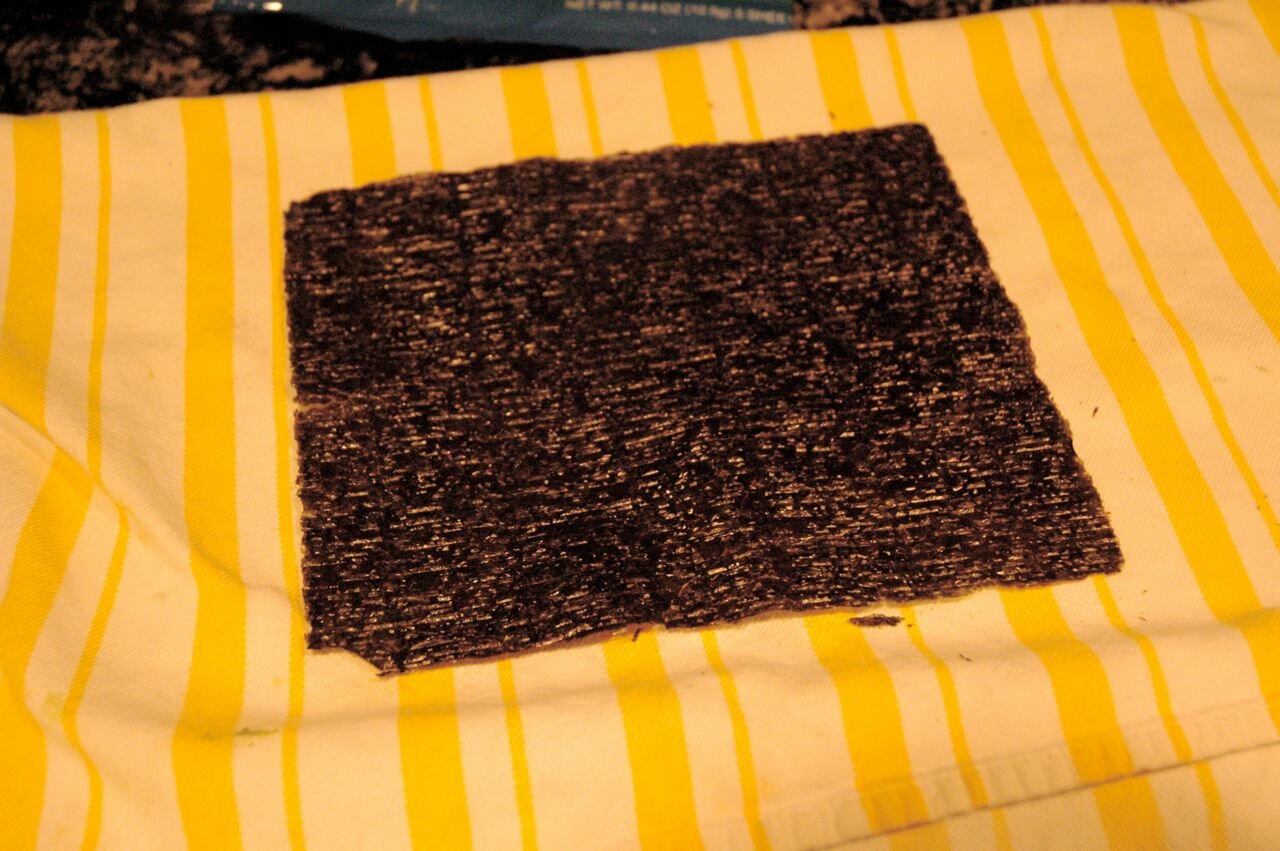
Take your nori and make sure you place it rough side up. You will definitely be able to tell which side is the rough side.
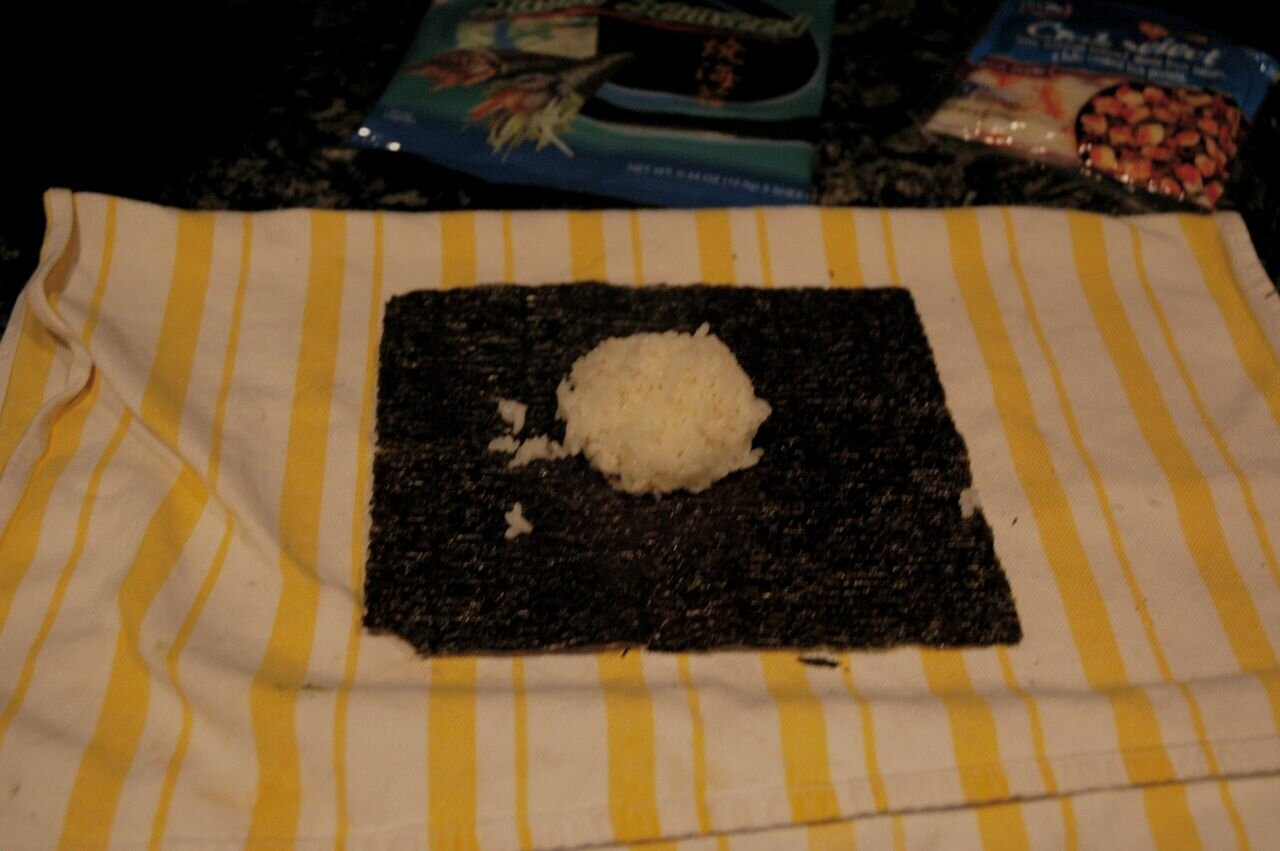
Now make sure to get your hands a little wet (the rice is very sticky) and place a rice ball in the middle of the seaweed. I will warn you that I really like the rice so I tend to use a lot more than necessary (you will see this at the end

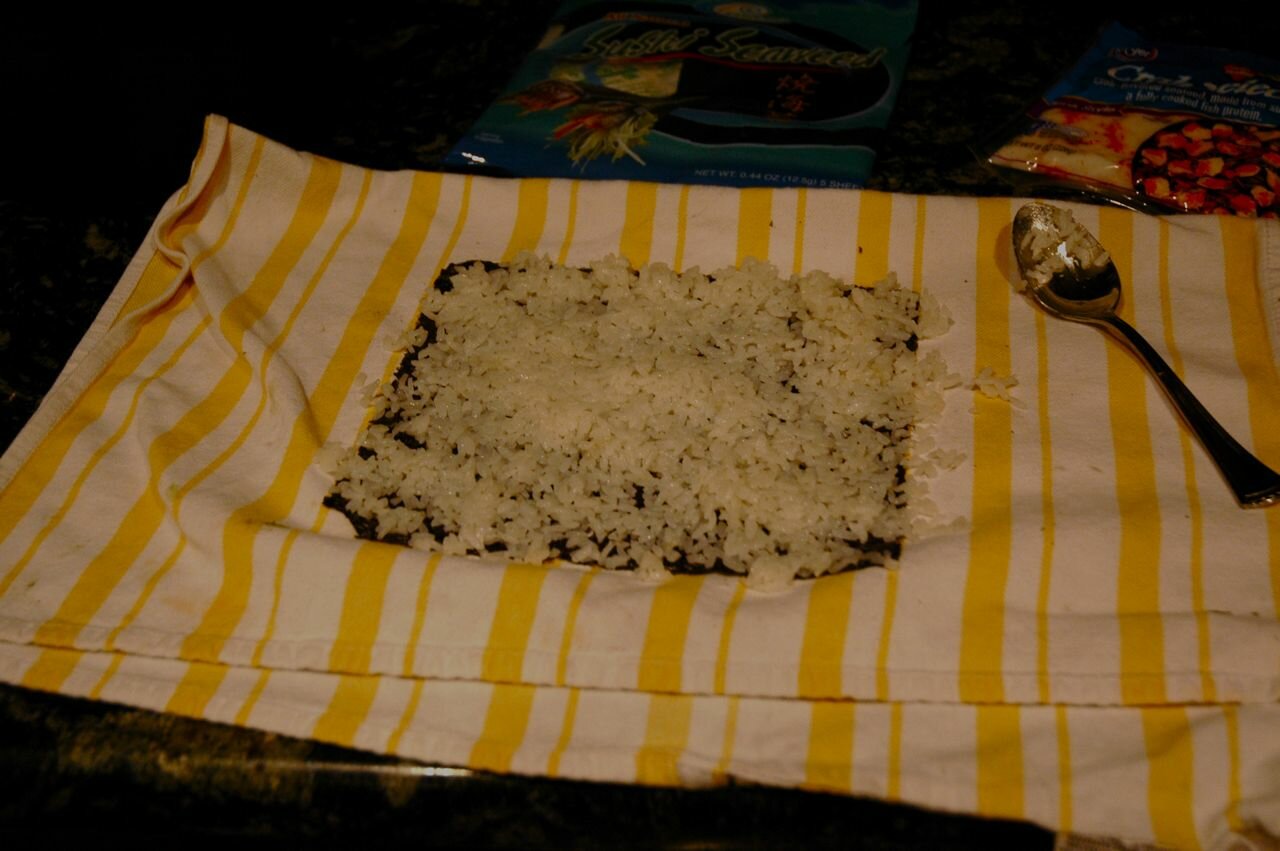
Spread the rice out on the nori. Like I said, I like LOTS of rice, so you do not need to use as much rice.
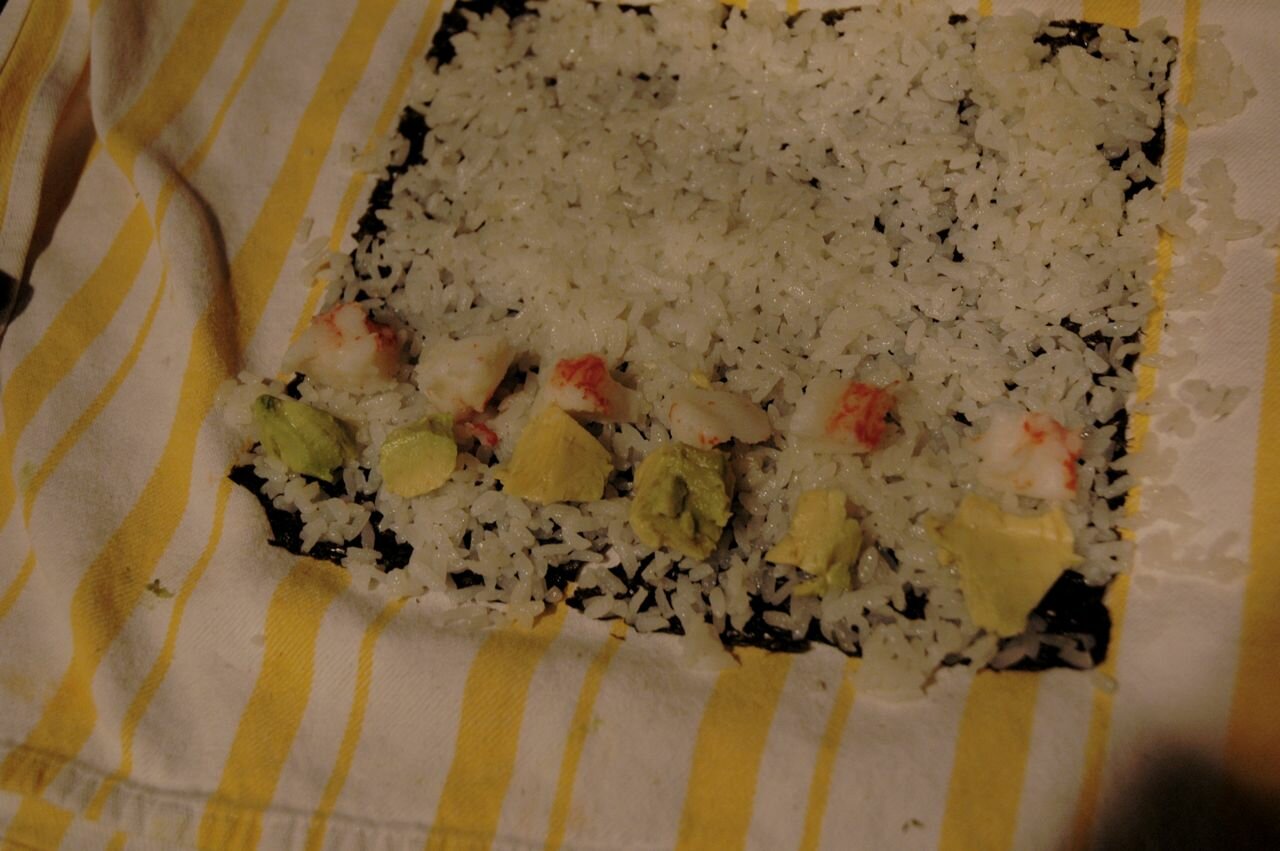
Now place your toppings on top of the rice. I like to space mine out within each piece but you can also spread it out across the whole roll and then just cut through it when you are cutting your pieces.

To begin your roll life up the end and bring it over to form a small roll. Make sure the sushi is at the end of the towel so you can roll it over.
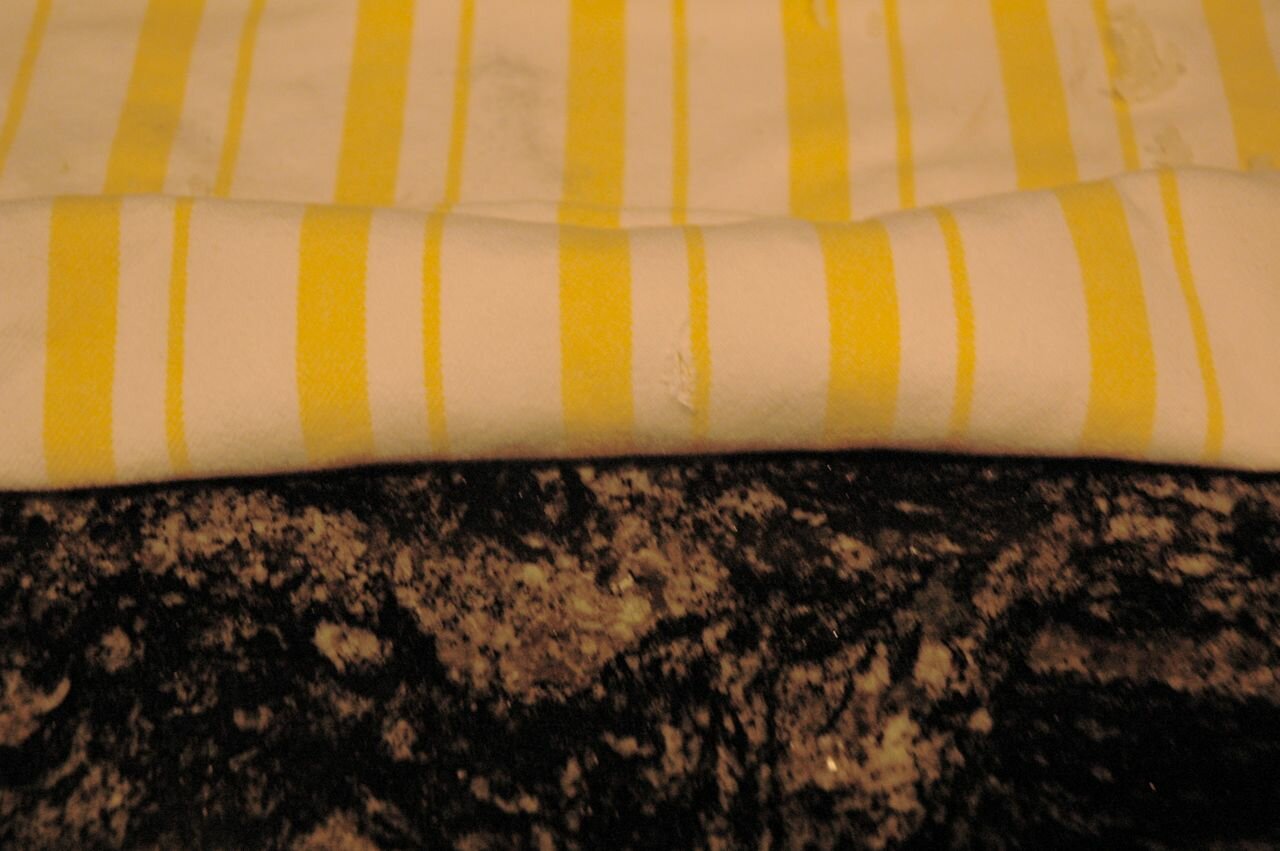
Hold the towel and roll it as tight as you can.
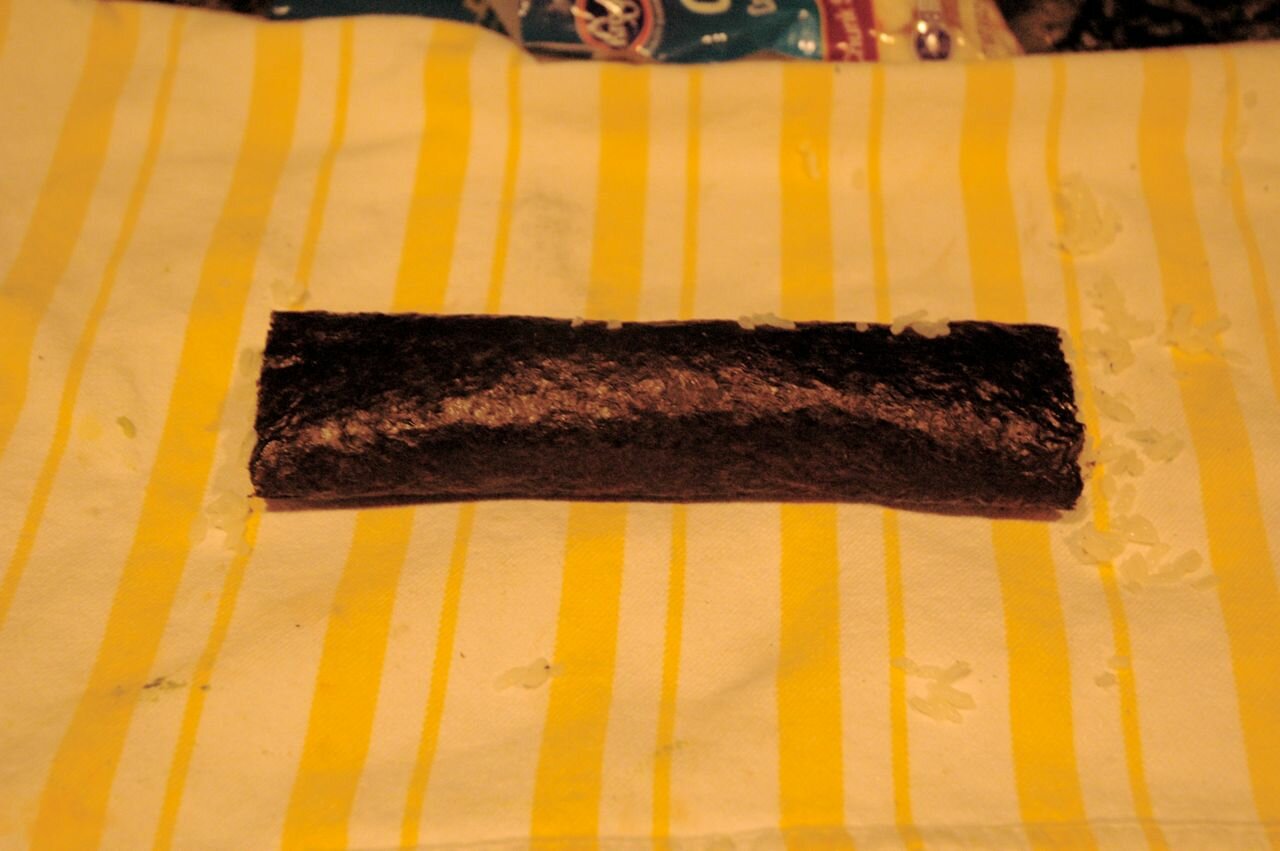
When you are done it will look like this. Nice and tight and rolled up. Now, you can stop here but I like inside out sushi where there is rice on the outside too.
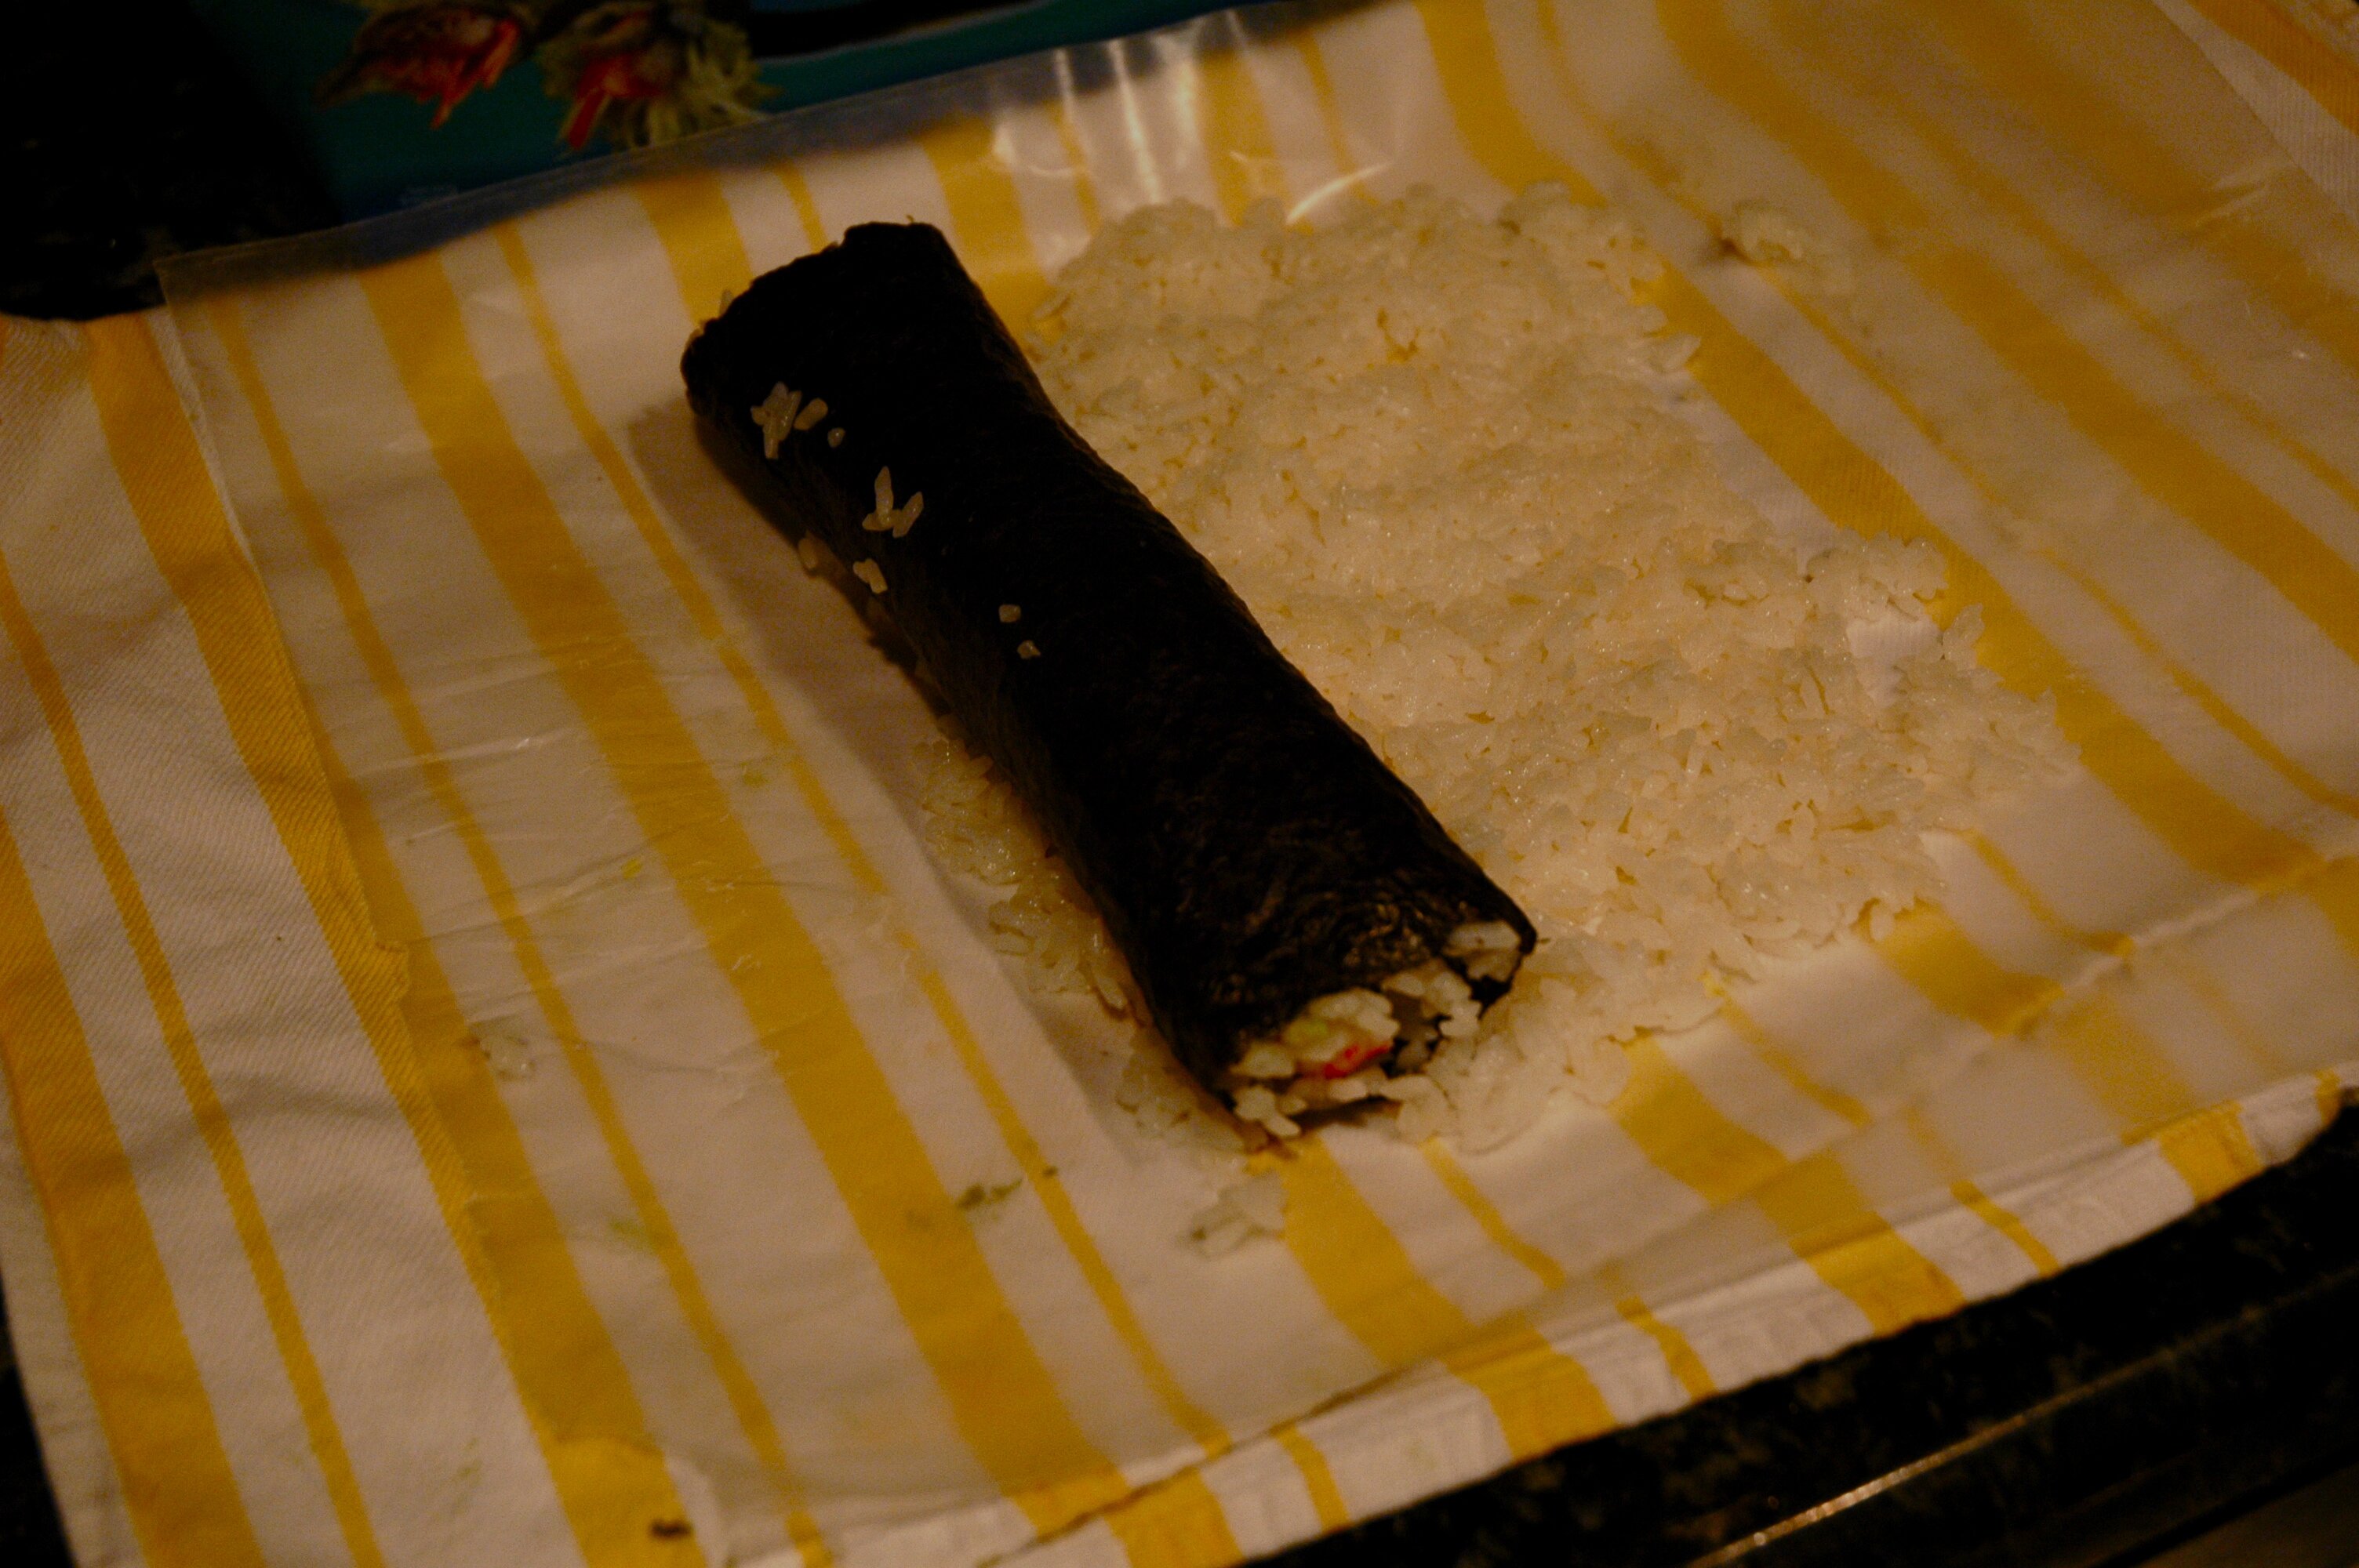
I use wax paper and spread out enough to roll around the entire sushi roll. I then place the roll at the edge of the rice.
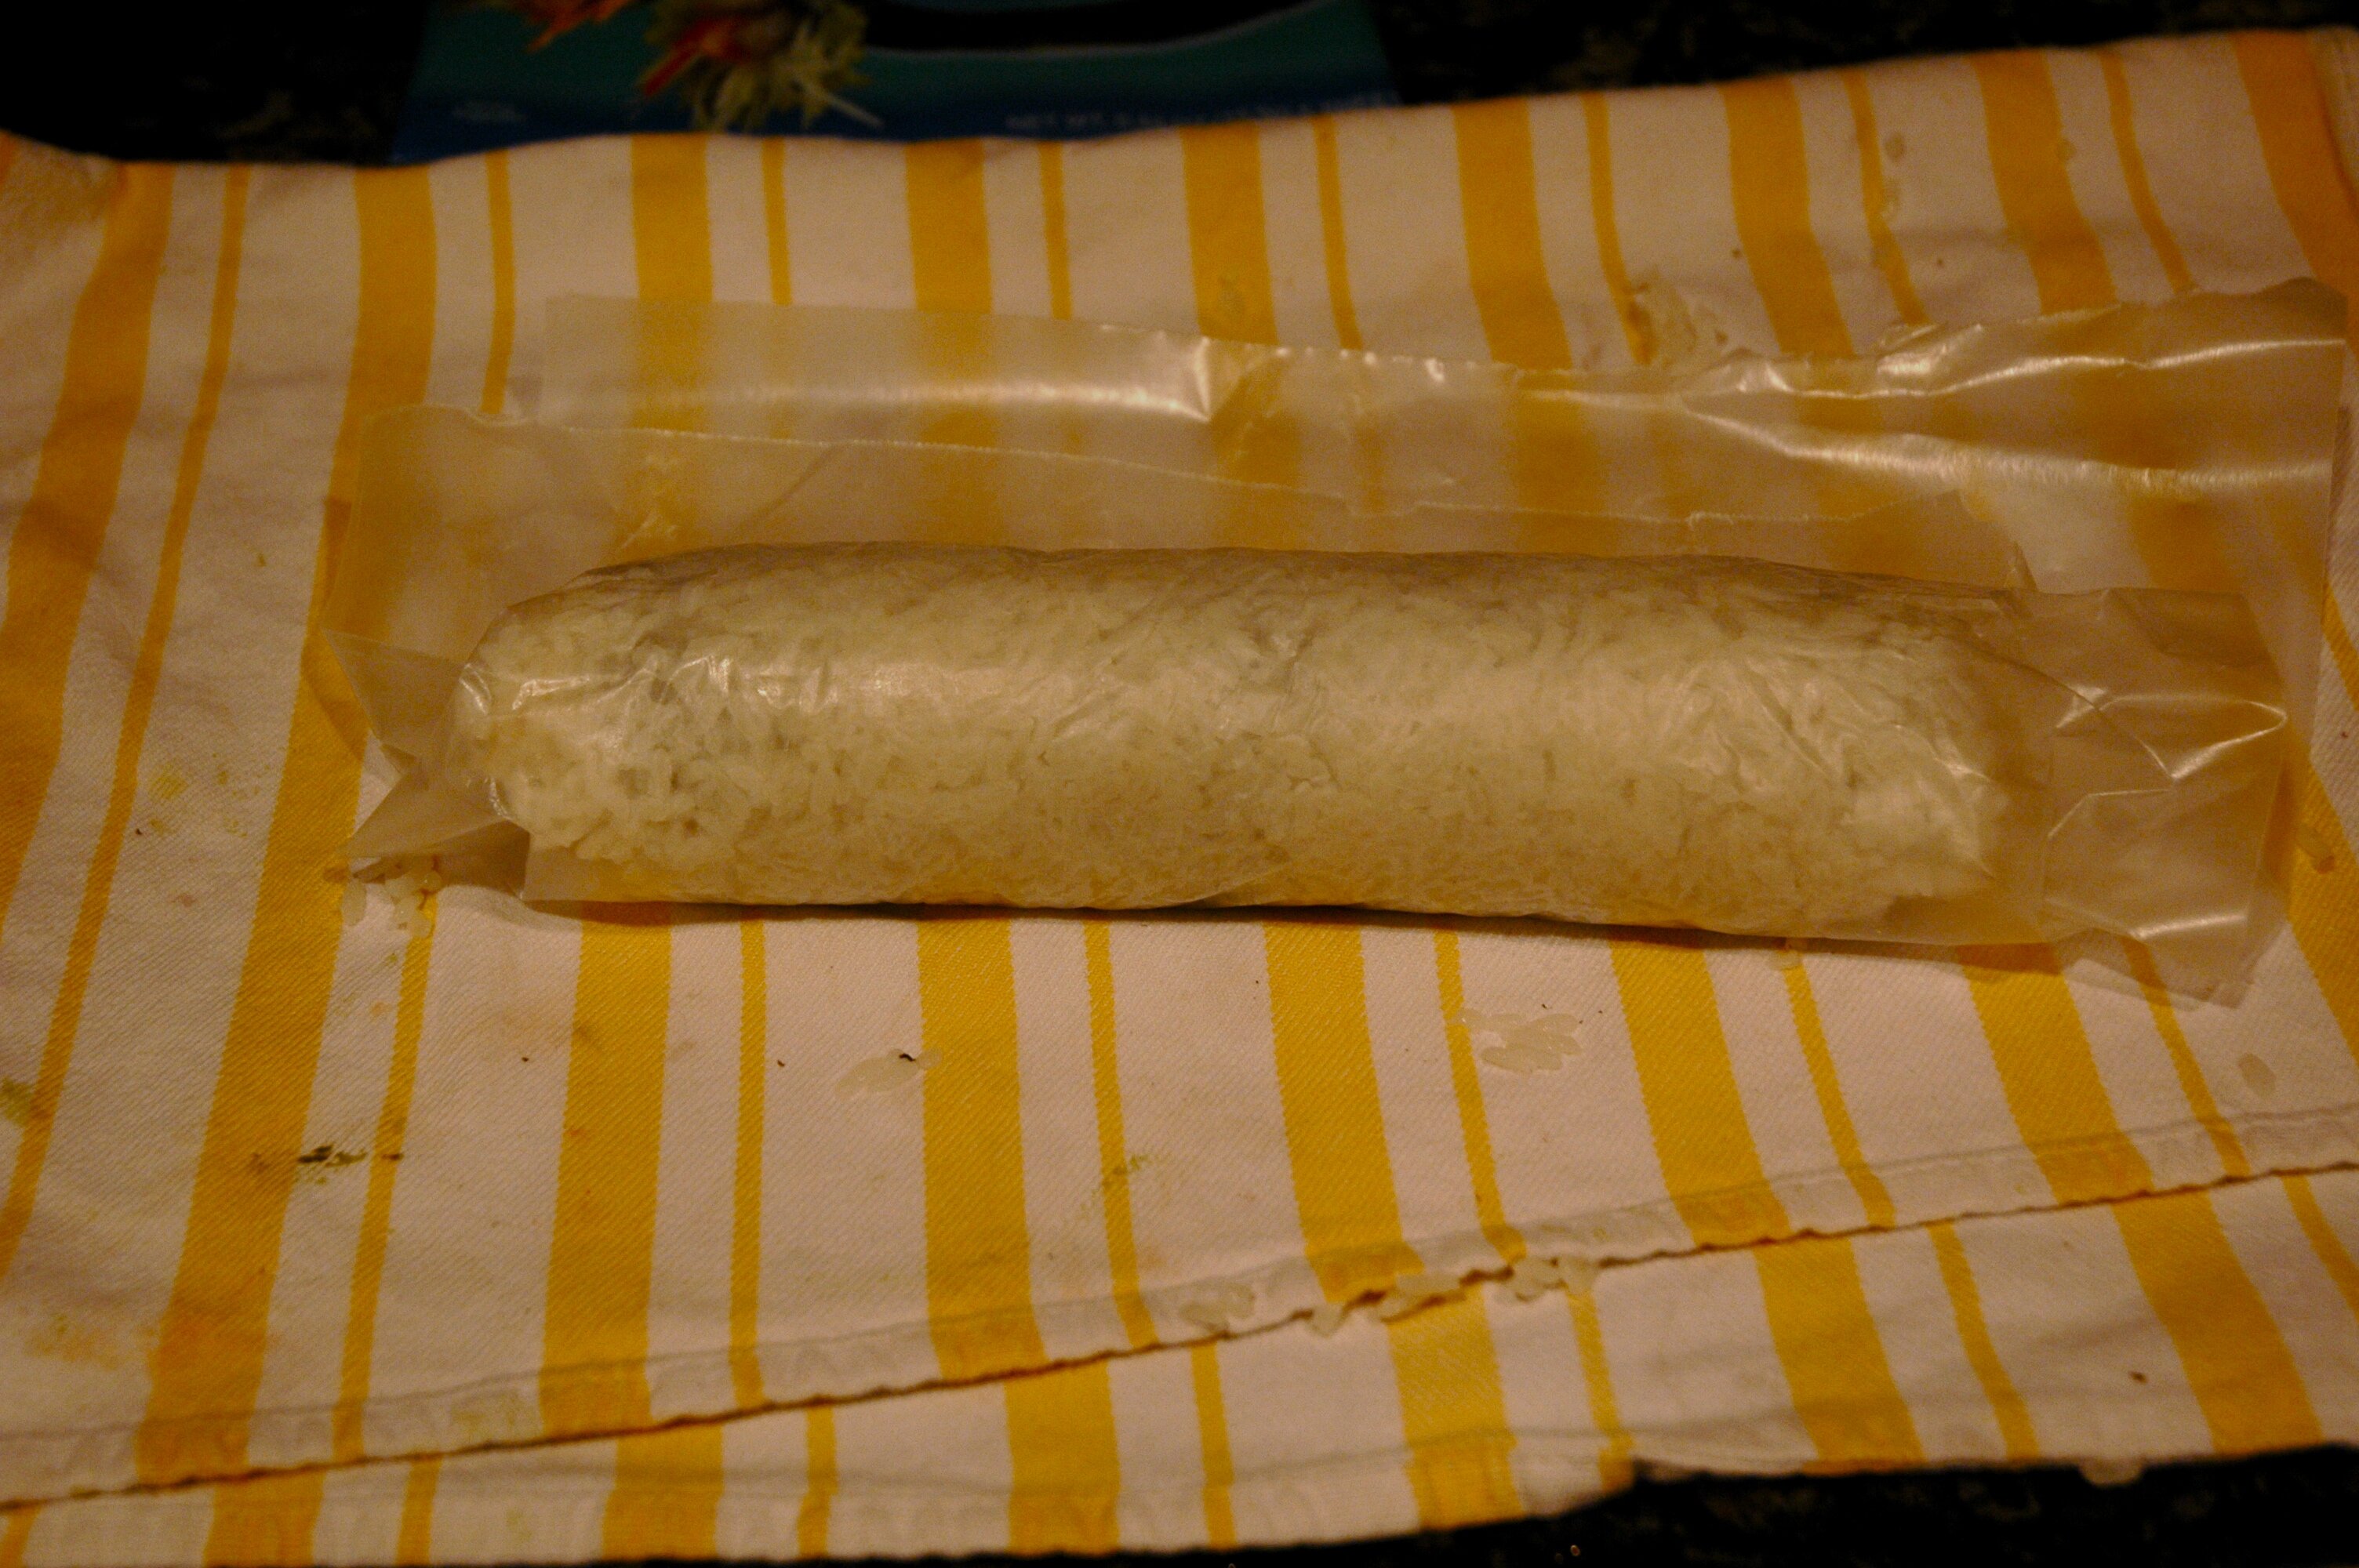
Try to get this as tight as possible too. This is what it will look like all wrapped up. Remove the wax paper.

Now it is time to cut it. Make sure to use a very sharp knife. Cut into strips. The nori comes with pre-marked lines but when you place rice on the outside you obviously cannot see them

Enjoy! As I mentioned, I put lots of rice on mine so they are larger than the sushi you would buy in the store but it is all about preference. You can experiment with different fillings- different veggies and meat.
I hope you enjoyed my sushi tutorial!! Let me see what you have been working on! And as always, if you would like to have a tutorial featured please leave a comment or email me.
Promote The Handmade Pact
Please grab a badge to let others know to come link up!