06-07-2014

Tastiest Lasagna [Recipe]

Best Lasanga

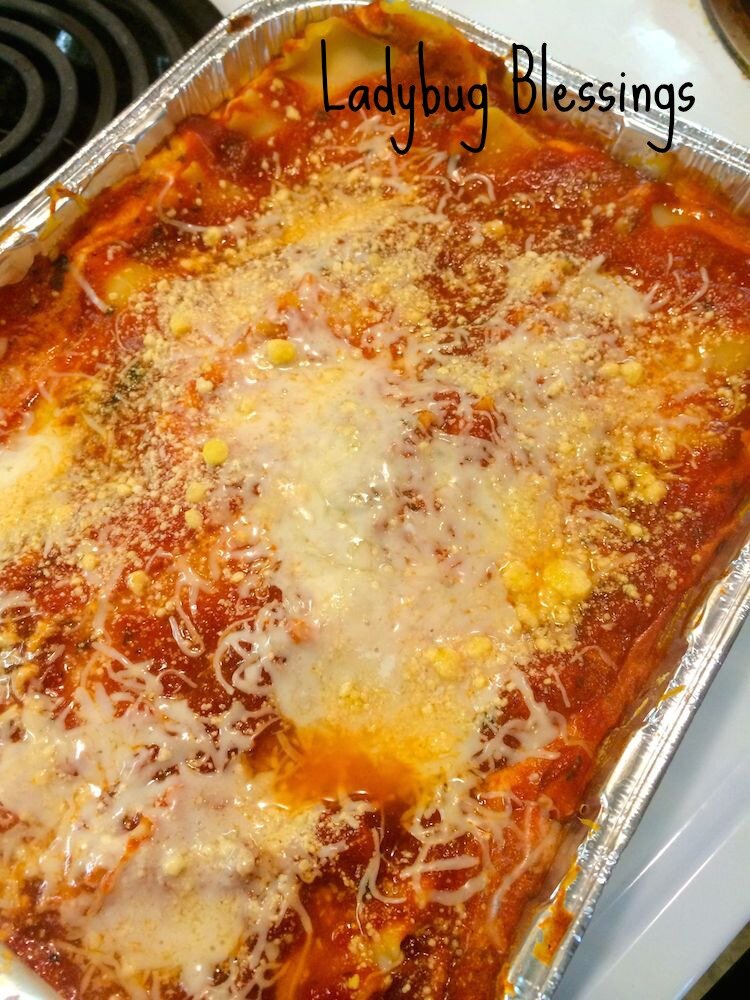
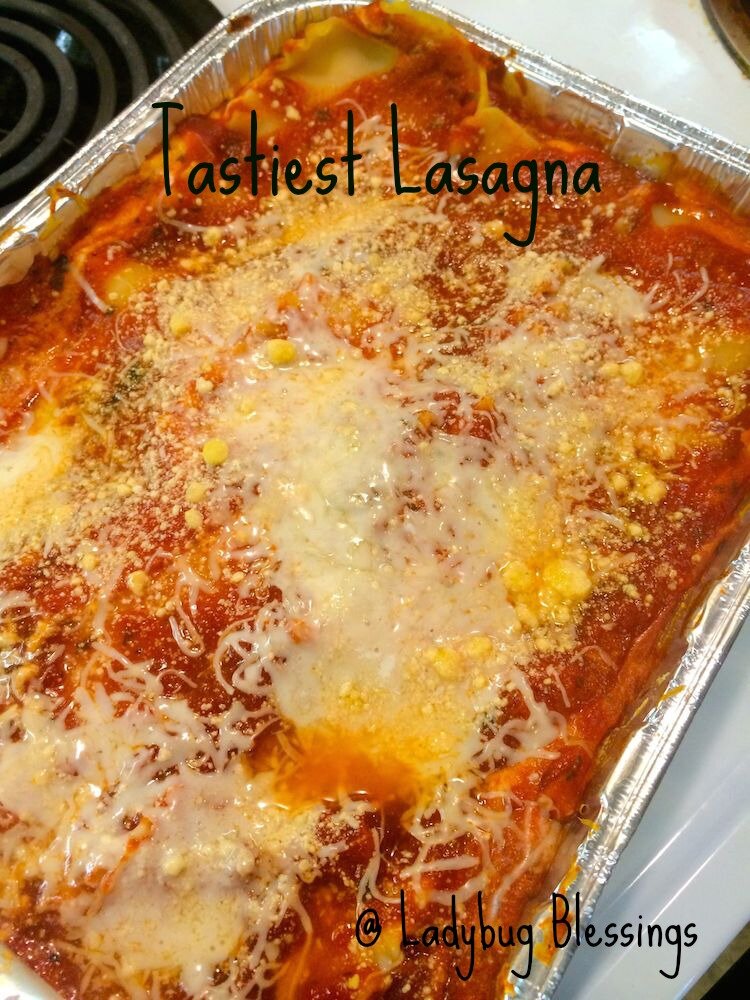
I have grown up eating Italian food as my grandmother is full Italian and my mom is half.  It creates for some amazing cooks and some wonderful Italian food.  Whenever someone in the neighborhood was sick or needed food Mom was the first one who offered to bring dinner and 9 times out of 10 she made lasagna for the neighbors.  I have started making the same lasagna when I am making meals for people.  It is a perfect meal to make for families because I can cook it and freeze it and then bring it to them.  They can keep it frozen if they want and heat up piece by piece or cook the entire lasagna at one time.  You can also half the recipe for smaller lasagna as this makes a large amount.
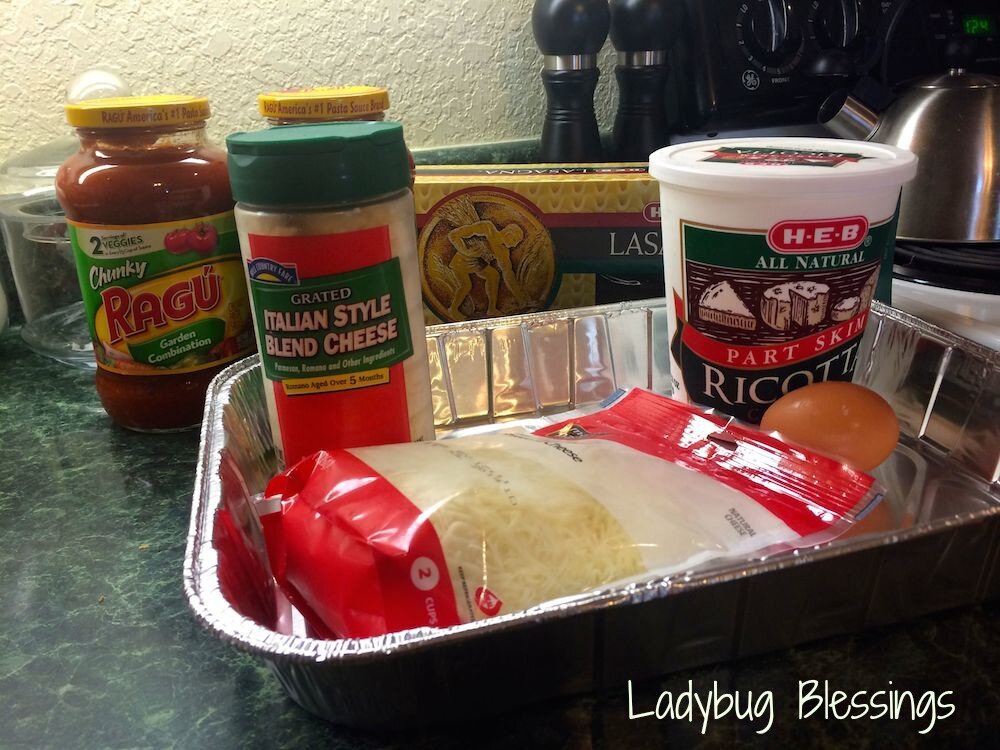
Lasagna Ingredients
Ingredients

  • 1 lb. lasagna noodles (the kind you boil)
  • 2 lbs ricotta cheese
  • 2 eggs
  • 16 oz mozzarella cheese
  • parmesan cheese (to sprinkle on top)
  • 64 oz jar favorite pasta sauce

*Most of the time when I make this I 1/2 it.  This recipe makes A LOT.

Directions

*Preheat over to 350 degrees

  • Boil noodles in salted water until just above soft and then Drain.
  • While noodles are boiling, mix the ricotta cheese and eggs until they are smooth.
  • Add most of the mozzarella cheese and mix that up.
  • Take your pan and put sauce in the bottom.
  • Place three noodles across the bottom of pan.
  • Spread some of the ricotta mixture along top of the noodles.
  • Add some sauce and spread that over the ricotta.

7

  • Then layer with three more noodles.
  • Then add more ricotta over next noodles.
  • Then add more sauce.
  • Repeat till you end with three noodles.
  • Top that with more sauce and sprinkle with remaining parmesan and mozzarella.
  • Bake at 350 covered with foil for about an hour.
  • Take off foil and bake for 15 more minutes.
  • Let sit for about 10 minutes before serving.

Yummy Lasagna

05-21-2014

Oreo Ball Recipe

Oreo Balls Recipe

 Oreo Balls are my favorite, easy, go-to dessert to bring to people’s events.  They are always a hit and they are pretty simple to make.

oreo-balls-supplies


All you need is some Chocolate Cream Cookies.  The Target brand is surprisingly pretty tasty.

oreo-balls-smash-1


Smash them.  I start by hand and then use whatever tools I have to finish the job.  You can use a processor.  You want them pretty finely crushed.

oreo-balls-smashed-2

Keep going.


oreo-balls-cream-cheese

Then add the cream cheese.  You want to have it warmed up first as it will make it easier to mix it in.

oreo-balls-mix-2


I start mixing by hand and then I add the hand blender.

Oreo-balls-cookie-sheet

Roll them into balls.  I’d say they are about an inch and a half across.  Then put this in the fridge to get cold.

oreo-balls-chocolate

While the balls are in the fridge, melt the baker’s chocolate.  I melt about 8 squares at a time.  Drop the ball into the chocolate and cover the entire ball.

oreo-ball-chocolate-sprinkles

I get the ball out with a spoon (or a toothpick) and place them on the cookie tray.  You can decorate with melted chocolate or sprinkles.  Then once they are all covered place the sheet back in the fridge to cool.  You can then pull them out and place them on a plate.  Go ahead and keep them in the fridge or the freezer.

oreo-balls-finished

They are delicious!


Oreo-Ball-Recipe

01-17-2011

Handmade Tuesdays [Handmade Pact]

So I hope everyone had an excellent weekend. I had a friend in from Australia and got to play Nashville tourist and had a blast! (Hence my lack of posting!) This week’s Handmade Tuesdays tutorial is a little different in I have never had a food tutorial AND I have never done the tutorial myself. But I am currently obsessed with sushi and wanted to show you how to make your own at home! I do not have any fancy tools, or even the “required” mat. So it can be done with absolutely no supplies other than the food. Enjoy!


First you need to gather your supplies. They sell them at most grocery stores. You may either be able to find them in the International aisle or in the seafood section where they sell the sushi.
Supplies

  • sushi rice- it is a certain kind of rice. It is not as long as other types of rice.
  • Rice vinegar- Do not use regular vinegar. Not the same thing!
  • Seaweed aka nori- this comes in sheets
  • Fillings- I use crab, avocado and I would have used cucumbers if I would have had some.


Start by making and seasoning your rice. Cook the rice according to the instructions and then add the vinegar when it is still hot.


Take your nori and make sure you place it rough side up. You will definitely be able to tell which side is the rough side.


Now make sure to get your hands a little wet (the rice is very sticky) and place a rice ball in the middle of the seaweed. I will warn you that I really like the rice so I tend to use a lot more than necessary (you will see this at the end :)


Spread the rice out on the nori. Like I said, I like LOTS of rice, so you do not need to use as much rice.


Now place your toppings on top of the rice. I like to space mine out within each piece but you can also spread it out across the whole roll and then just cut through it when you are cutting your pieces.


To begin your roll life up the end and bring it over to form a small roll. Make sure the sushi is at the end of the towel so you can roll it over.


Hold the towel and roll it as tight as you can.


When you are done it will look like this. Nice and tight and rolled up. Now, you can stop here but I like inside out sushi where there is rice on the outside too.


I use wax paper and spread out enough to roll around the entire sushi roll. I then place the roll at the edge of the rice.


Try to get this as tight as possible too. This is what it will look like all wrapped up. Remove the wax paper.


Now it is time to cut it. Make sure to use a very sharp knife. Cut into strips. The nori comes with pre-marked lines but when you place rice on the outside you obviously cannot see them :)


Enjoy! As I mentioned, I put lots of rice on mine so they are larger than the sushi you would buy in the store but it is all about preference. You can experiment with different fillings- different veggies and meat.
————–

I hope you enjoyed my sushi tutorial!! Let me see what you have been working on! And as always, if you would like to have a tutorial featured please leave a comment or email me.

Promote The Handmade Pact
Please grab a badge to let others know to come link up!